Pages

Thursday, 7 April 2016

Easy Do It Yourself Tip to make clay trays!


Materials: Clay in 3 different colors, shallow glass bowl, circular items to use as stencils (lids, small bowls,etc.), butter knife, pen with a flat end, scrap piece of lace, rolling pin.

Instructions:

Roll Out Clay


Condition the clay by rolling it around in your hands for a few minutes. Once soft, start rolling it flat with the rolling pin to a 1/8-inch thickness.

Create a Lace Pattern


To create the lace pattern, lay the scrap piece of lace over the flat clay.


Roll over the lace a few times with moderate pressure to imprint the clay.


Pick up the lace to make sure the pattern transferred onto the clay.

Create Polka Dots and Stripes
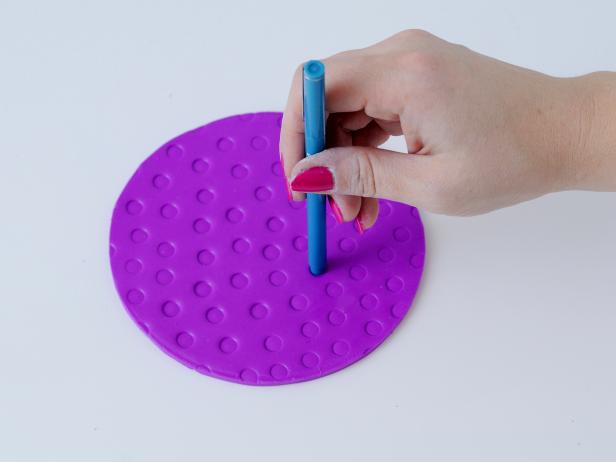


Use the flat end of a pen to create a polka-dot pattern in the clay.


To make stripes, drag a butter knife with very light pressure on top of the clay.

Cut Out Circles


Place a circlular object, about 4-5 inches in diameter, over the clay to use as a stencil.


Cut around the stencil with a butter knife.


lightly smooth out the edges with your fingers.

Bake Clay


Turn over a shallow bowl. Place the clay circle right side down over the bowl, and lightly press down until it takes the shape of the bowl.


Use a larger shallow bowl as a mold for a larger piece of clay.


Bake according to the clay packaging instructions.


Place these trays on a dresser to hold jewelry, or use it on an entryway table as a catchall tray.

Courtesy - http://www.hgtv.com / Jessika Creedon 

Saturday, 5 March 2016

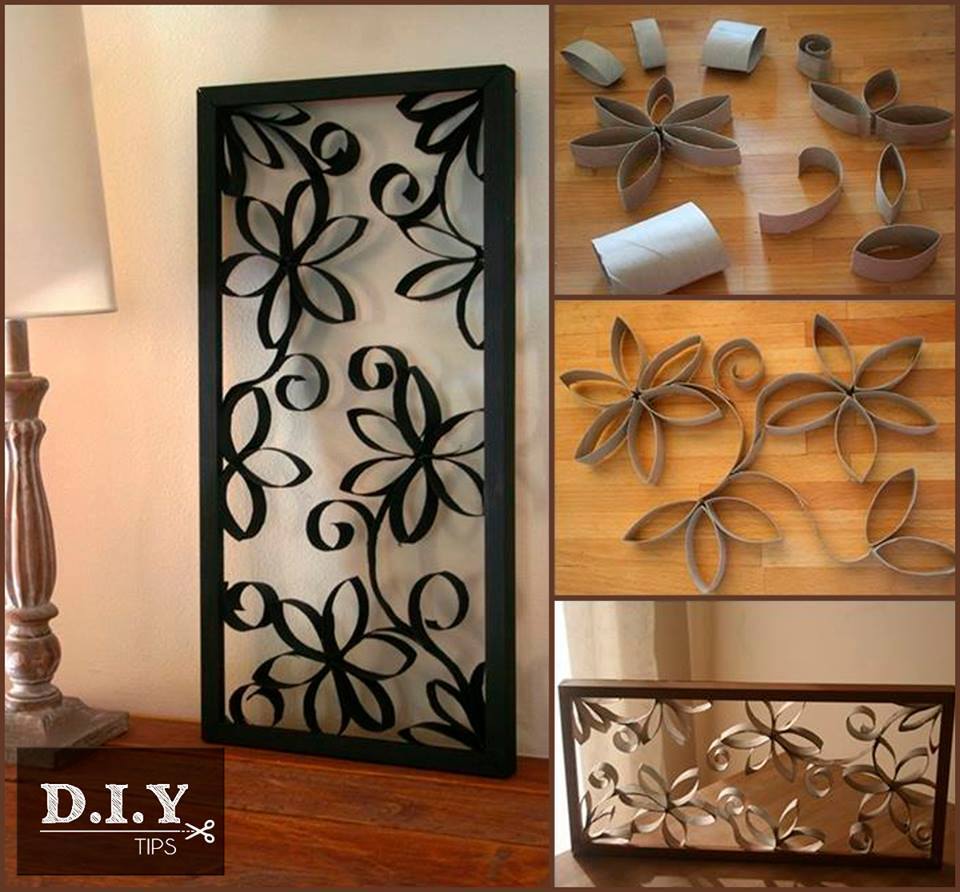
Do It Yourself Tip - use old paper rolls & spruce up your walls with flower motifs.


It’s not every day that you find a clever way to reuse something from the bathroom, upcycle old paper rolls & spruce up your walls flower motifs.

Materials: Paper rolls,Scissors,White glue,paint(as per your choice).

Steps:

1. Crush paper roll. Place the rolls on a flat surface.

2. Create a desired pattern.Try different compositions & patterns.

3. Glue where rolls are touching.Expend the pattern in to an organic cell growth,you may paint and add sparkles & you are done! – BROWN & Black

Saturday, 6 February 2016

Do It Yourself - Interesting way to make a jute seat out of unused tyre.


Take an unused four wheeler tyre. Drill at six places and fasten two plywood planks by cutting them into two circles of 55cm diameter each. Screw the planks to your tyre tightly enough so that it won’t come off. Do it on the reverse side of the tyre as well. Take sisal rope and start glueing at the center of the circle in order to obtain a perfect finish. With the hot glue gun, apply the glue on the board and secure one end of sisal.

Use enough glue to stick and move the sisal rope round in a snail shape. Repeat till you make sure that the end of the sisal from the board meets the beginning of the one on the edge. Do this for the reverse side of the tyre as well. Once you cover the entire tyre, cut the rope.
Apply the sealer to the brush and cover all sisal surface with it. Wait one hour before you put another coat on it. This sealer is ready to touch after one day but the complete drying takes two weeks!

Your sisal rope seat is ready!

Explore more fabric collections @ Homes Furnishings

Monday, 4 January 2016

DIY Tip - Make a trendy centre-table and re-define the art of home decor


REQUIREMENTS:

Materials:
  • Round wood logs cut 18 inches long
  • 4×8-foot sheet plywood
  • Wood glue
  • Wood screws
  • Grout
  • 4-inch casters
  • Clear polyurethane

Tools:
  • Circular saw
  • Miter saw
  • Drill Machine
  • Grout float
  • Putty knife

Method:
  • Use the plywood to create a base of 33×24 inches and a box measuring 27x18x16 inches. Cut two 27×16-inch and two 18×16-inch pieces for sides and one 27×18-inch piece for the top. Unite the box to the wooden base using screws.
  • Use a miter saw to cut logs to 18 inches. Using wood glue add logs to the wood box and base and screw through each log for extra strength.
  • Close the box with the plywood piece you have cut in step 1 and secure it to the rest of the box with screws.
  • Cut 1 inch wood rounds from the logs and place them to your box top using wood glue, masking the box underneath.
  • To fill the empty spaces remained between the pieces of logs, add grout to the entire surface and even it with a grout float. Use a putty knife to remove the excess grout from the coffee table and let the grout dry well before moving on.
  • Attach rolling feet to the base of the centre table using screws by positioning them 1 inch from the edge. For the finishing touch, add a coat of clear polyurethane to the table.
You are done!

Courtesy:-Homesthetics